Smart Analysis
This post will show you how to set up predefined rules for your packages. Whether you will be making standard rules that apply to every package your organization creates or standard rules for a particular product, analysis rules will make your workflow easy.
Introduction
With the release of Smart Package Studio, we’re authoring a series of blog posts to give examples of packaging tasks performed using it, as well as tips and tricks. This post will show you how to set up predefined rules for your packages. Whether you will be making standard rules that apply to every package your organization creates or standard rules for a particular product, analysis rules will make your workflow easy.
Prerequisites
- Smart Package Studio 4.5 or newer.
Guide
This post will cover how to create rules and share rules with others.
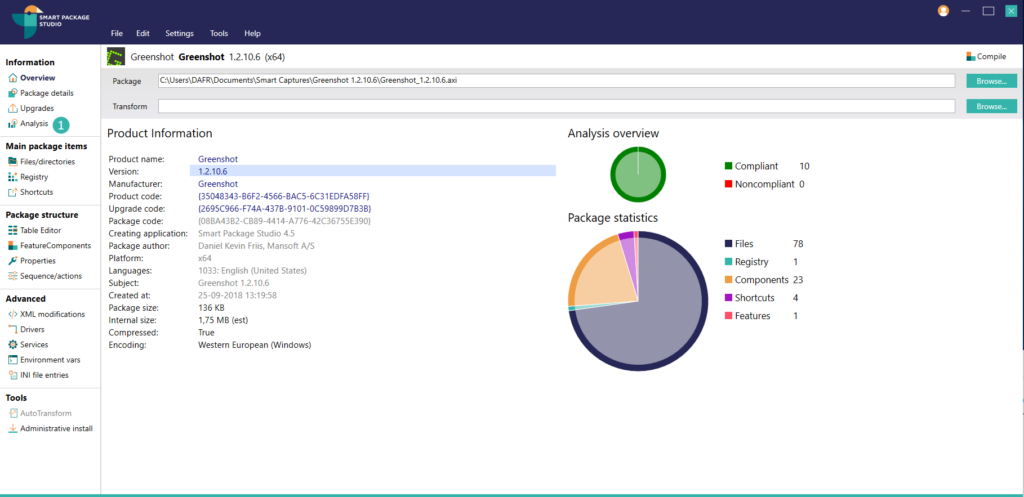
Start Smart Editor and open any package; we need a package open to access the Analysis section, but what package is opened is not important for this purpose.
Click on Analysis in the Information section.

The default template is our Standard template which contains useful standard properties that apply to almost all packages, such as setting the REBOOT=ReallySuppress property.

The default view displays all the template entries that apply to the currently loaded package; that is to say, it displays the entries that the current package does not conform to.
Clicking Select applicable and then Fix selected will apply the listed changes to the currently loaded package.
To view all entries in the current template, even those that the package does conform to, click on All entries in the template overview.

The standard template is a good place to add rules that should apply to all packages within your organization.
To add a new rule to the template, click on Add rule and a menu will give you a choice of different types of rules to add.
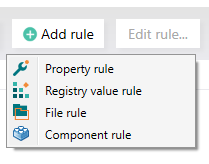
Let’s make a new Registry value rule.
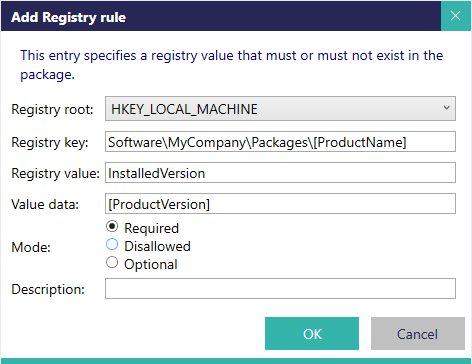
This is an example of a registry value rule. It requires that the package contains a registry entry with the specified registry root, key, value and data.
Pressing OK, you will see the new rule added to the end of the list of entries in the template.

When applying this rule, the specified registry value will be added to the currently loaded package.
Next we’ll take a look at how to make a new template and the different types of rules we can make.
In the Edit menu select Add new template.
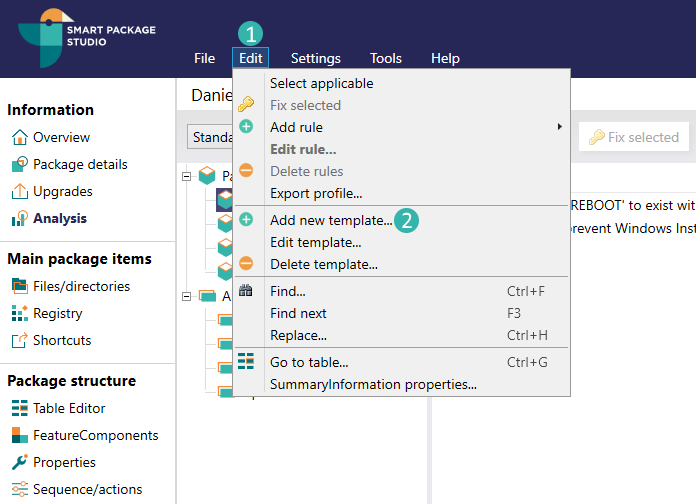
Here we can give a name and description to our new template.
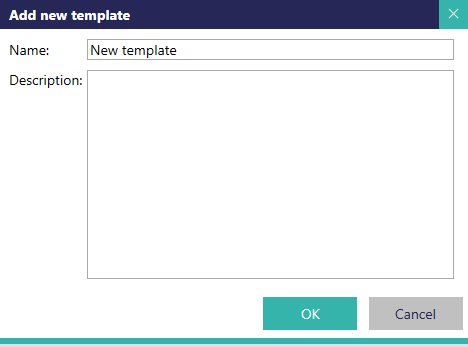
We will make an example template for Greenshot. After a normal capture of Greenshot, we would like to add additional settings to ensure that:
- The program language is set to English
- Automatic updates are disabled
- Nagscreens are disabled
- Ensure the program start when user logs in windows.
To do this we need to add a configuration file and a registry key. First create a file called Greenshot-defaults.ini that contains the following:
[Core]
Language=en-US
UpdateCheckInterval=0
IsFirstLaunch=False
Then add a new file rule:
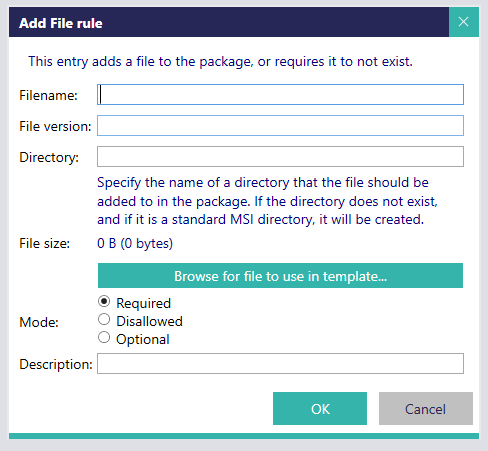
Click Browse for file and select the new file we created.
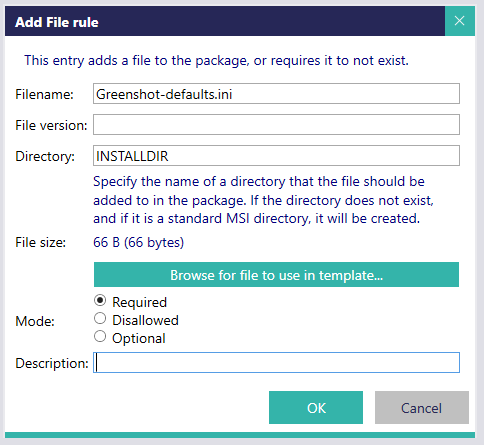
Directory is set to the name of the directory where we would like the file to be placed, in this case INSTALLDIR.
The Mode for the rule determines if the file is required to be present in the package, must not be present in the package, or must be identical if it is present in the package.

Next up, we make our registry rule that ensures Greenshot starts when a user logs in.

Note: The standard MSI property expansion syntax can be used in rules in the same way it can when directly editing registry values in the package. In this case, the [#Greenshot.exe] property is automatically expanded to the full path of the file with the identifier “Greenshot.exe” when the package is installed.
We now have two rules.

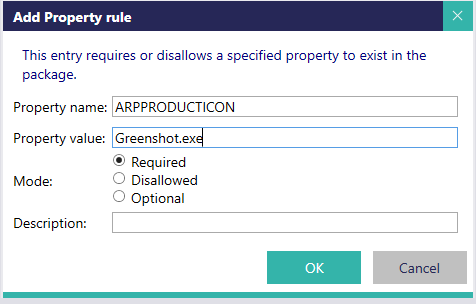
We could also add a property rule to make sure ARPPRODUCTICON is set. It is most likely already set, but this rule prevents mistakes from happening.
Note: The ARPPRODUCTICON property determines what icon, if any, should be displayed for the package in Features and Components in the Windows Control Panel. It is set to the name of an icon in the Icon table.
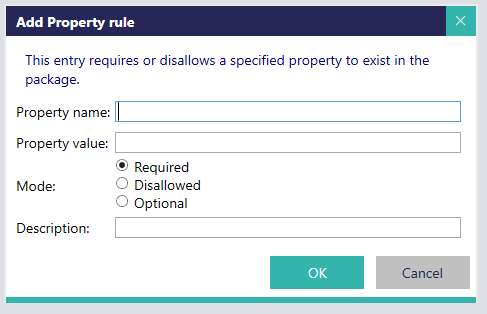
Add the property ARPPRODUCTICON with the value Greenshot.exe.
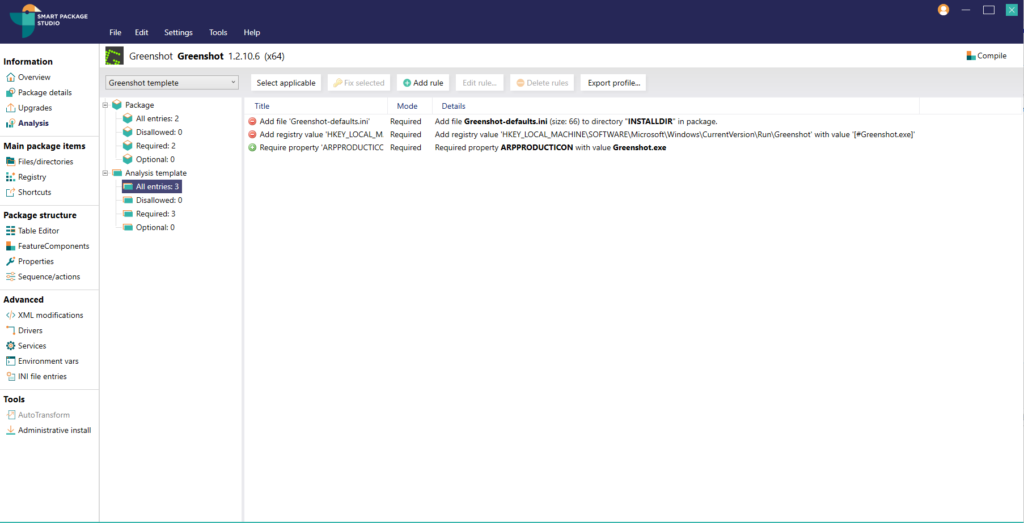
We now have three rules in our new analysis template. I have a Greenshot project open and it detects that my ARPPRODUCTION is already correctly set. Viewing all entries in the Analysis template, it is marked as green to signify this.
Next we’ll take a look at Row rules.
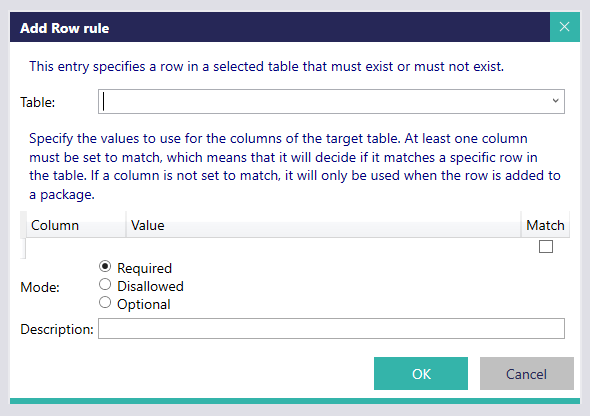
Row rules are rules that can affect any row in any table. These can be complicated to set up but are powerful because they can be made to customize any part of a package, unlike the more specific rule types (Property, File, Registry).
We would like to add a rule that removes the uninstall shortcut.
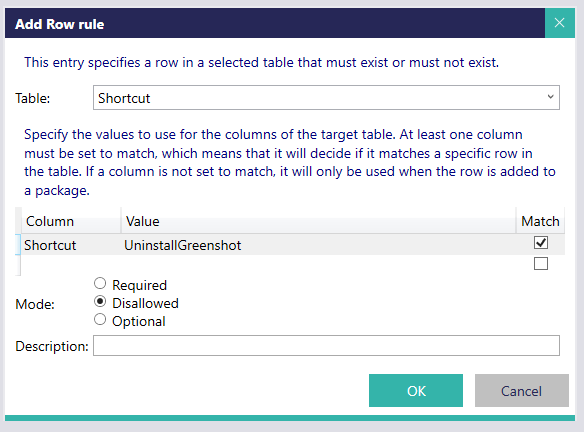
A list of standard tables is available to select from, but a custom table name may also be specified.
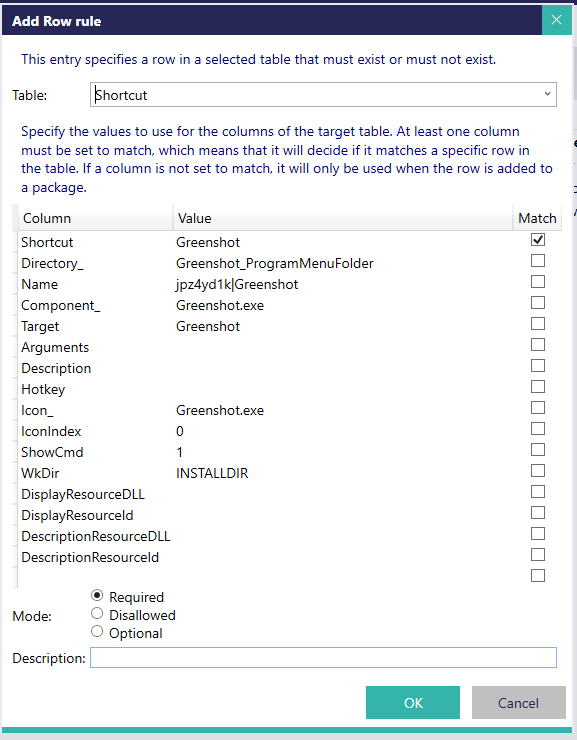
In this case we select the Shortcut table, after which we need to specify the columns to use for the rule. It is important to note if the Match option is set or not.
If the match option is set for a column, then the value of that column is used to determine if the rule matches a row in the table. If it is not set, then the value is only used when adding a row to the table.
Here we specify the primary column of the Shortcut table (also called Shortcut) and we would like to compare it to the value UninstallGreenshot.

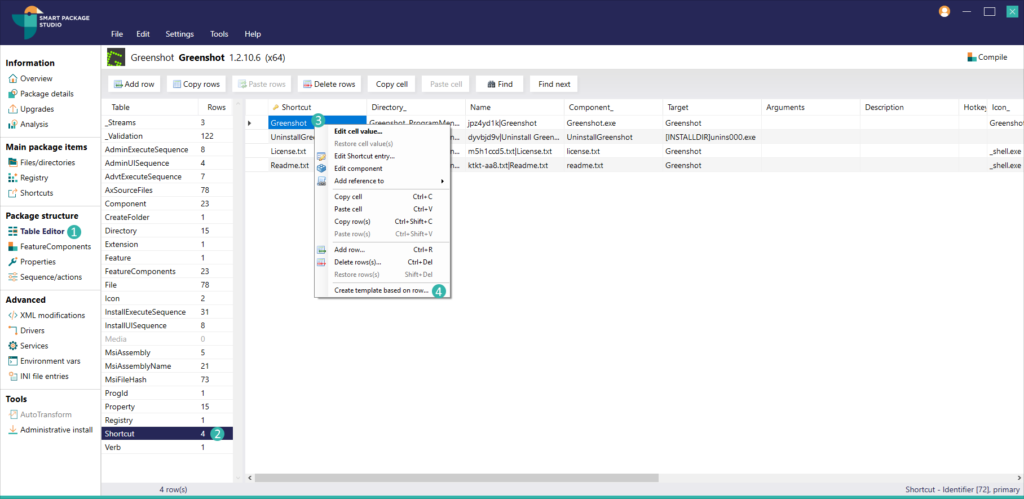
An alternative way to add Row rules is to go into the Table Editor view and find a row you would like to use as the basis for a rule. Right click and select Create template based on row.
Smart Package Editor will fill out all of the Columns and existing values for the rule.
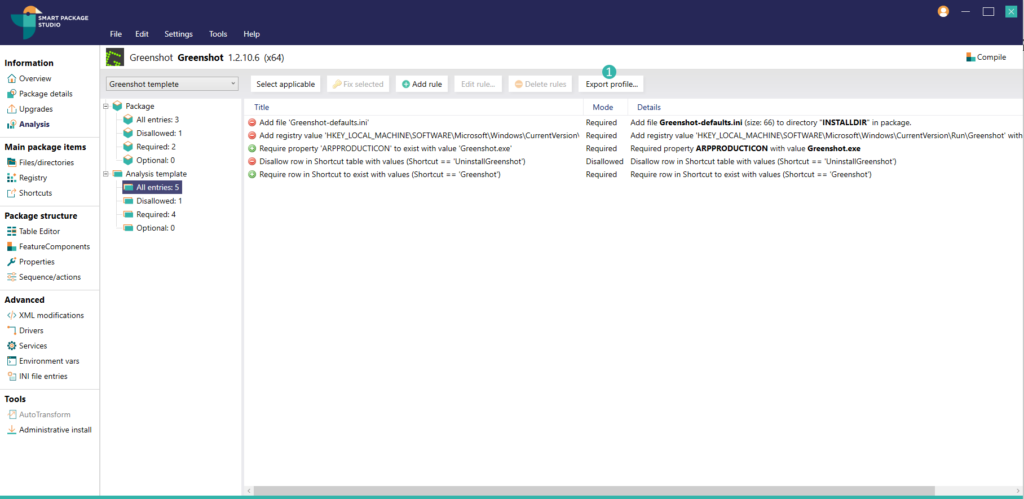
After we have created our analysis template, we can export these rules so that others can use them.
To do that we click on Export profile to save the rules as an XML file.
How you store the XML file is up to you. It may be on a network share for easy management of later updates for these rules for others in your company. Smart Editor can be configured to read the analysis rule file directly from a network share.
For importing XML file with rules, go to Settings -> Preferences (Ctrl+P).
In the Advanced tab you can select if the built-in internal template or a specified XML template file should be used, as well as setting what template in the file should be used as the default.

To specify a path to the analysis template file to use during deployment of Smart Package Studio, the following registry values can be set:
[HKEY_LOCAL_MACHINE\SOFTWARE\Axienne\PackageEditor]
“AnalysisTemplateFilename”=”Path to xml file”
“AnalysisTemplateUseInternal”=dword:00000000
Setting these values in HKEY_LOCAL_MACHINE will ensure they are always used for all users of Smart Package Studio on the PC.
Now you know more about how the analysis template feature of Smart Package Studio can be used to save time and streamline the packaging process.
Download your free 10-day trial today
- Downloading and evaluating Smart Package Studio is quick and easy
- Includes a short introductory guide that suggests smart features to try
- Access the full functionality of Smart Package Studio during the trial

