Smart Capture Manual
1. Description
Smart Capture is a program for creating MSI packages by creating a capture of non-MSI application
installations.
The purpose of the program is to easily and quickly go through the process of setting up the environment,
creating the captures, installing the target software, and generating the output project.
1.1. Features
- Capture any executable installer to an MSI package.
- Capture directly from the local machine, a VirtualBox virtual machine, or from a remote PC.
- Save virtual machine snapshots from one session to the next to cut scanning time in half.
- Automatically retrieve list of exclusions from the Smart Package Studio servers in order to minimize
time spent on managing what captured items the output project should contain.
2. Installation
2.1. Prerequisites
Smart Package Tester requires the following applications installed on the target PC:
- Microsoft .NET Framework 4.6.2
- Oracle VirtualBox 5.2. or newer is required for the virtual machine capture support.
2.2. Installation
Run the installation MSI for the appropriate version of your operating system (x86 or x64).
3. Usage
3.1. Choosing the capture source
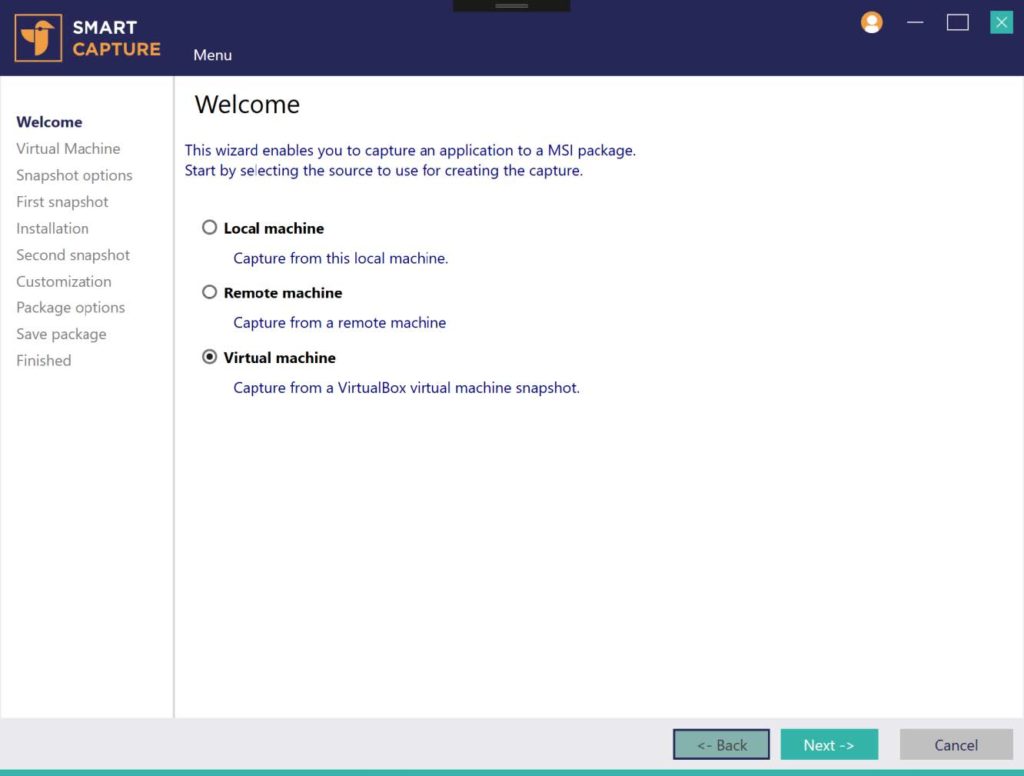
Smart Capture currently supports three sources for creating a capture:
- Local machine: Create a capture from the local machine that the program is running on. This usually
entails installing Smart Capture on a virtual machine and running it there. - Remote machine: Create a capture over the network from a remote machine. See step 3.2.
- Virtual machine: Create a capture from a VirtualBox virtual machine. See step 3.3
3.2. Configuring remote machine source
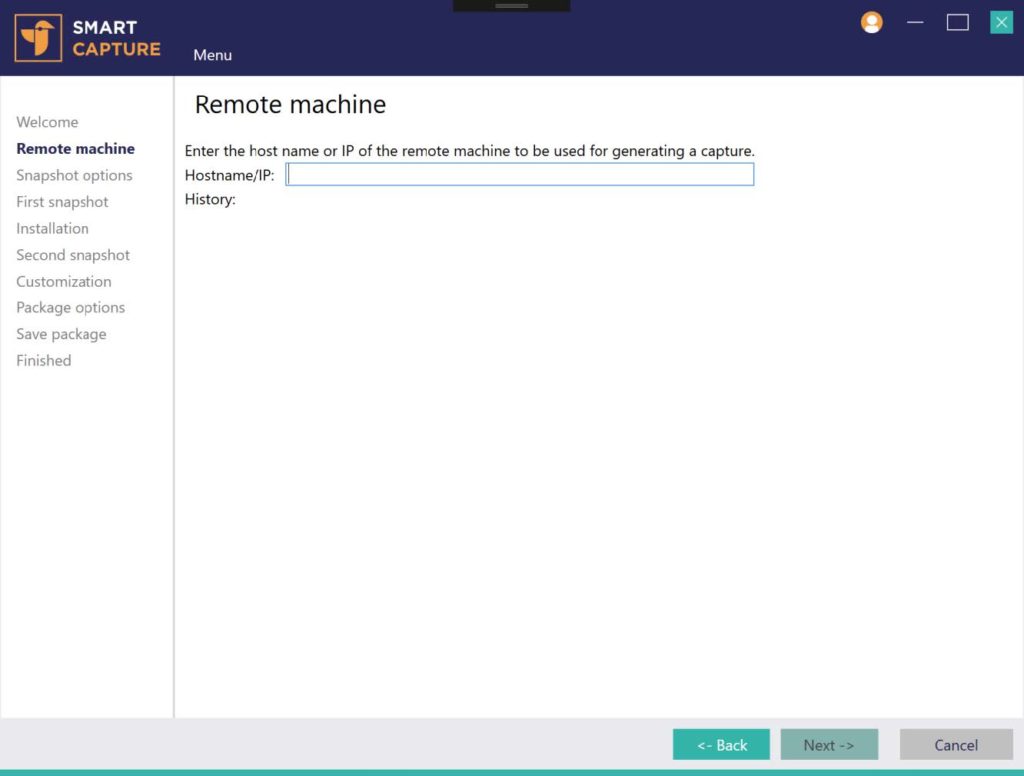
The remote machine source must be configured with the IP or the host name of the remote machine to connect
to. After pressing next, a dialog may appear if the current user does not have administrative rights on the
remote machine.
3.3. Configuring virtual machine source
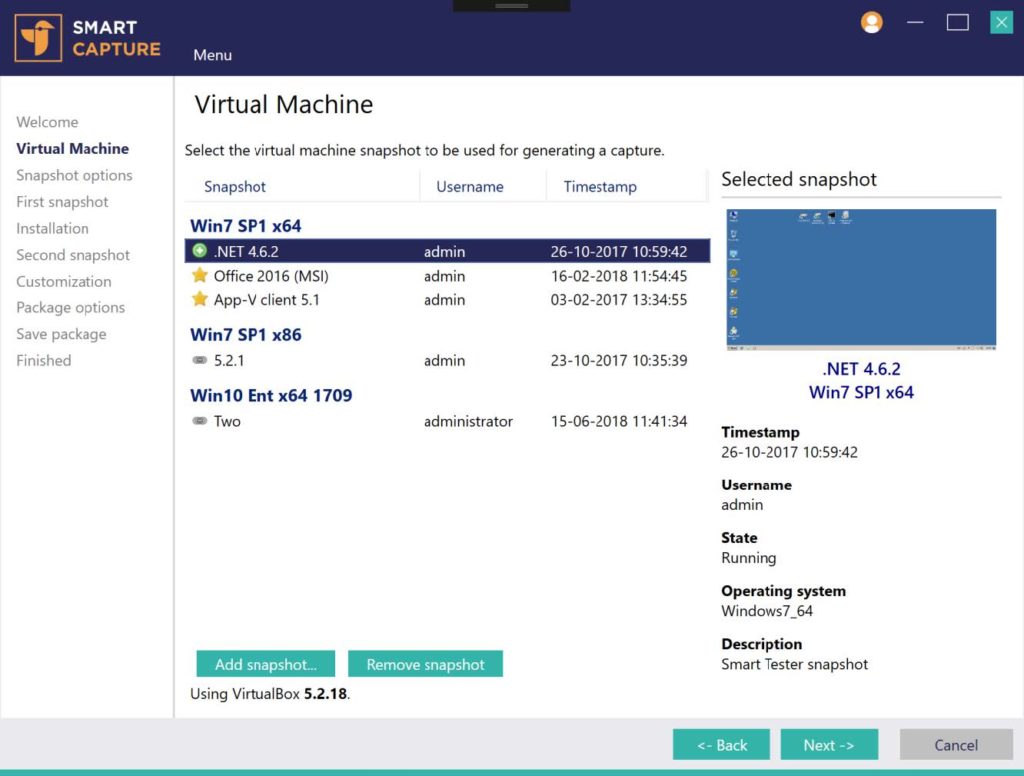
The virtual machine view enables choosing what virtual machine snapshot to use for the capture.
The snapshots available must be added to the program before they can be used. The snapshots added are shared
between Smart Capture and Smart Tester; any snapshot added in either program will be available in the other.
To add a snapshot, press the Add snapshot button.
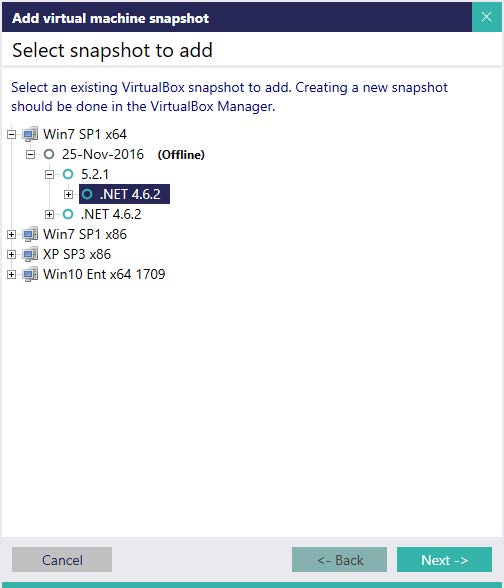
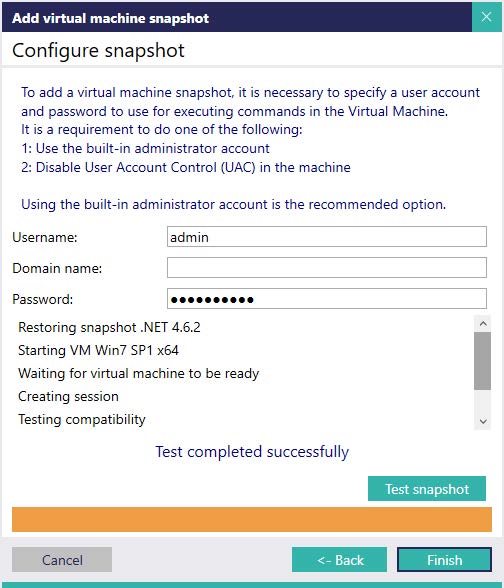
Figure 1 – Select snapshot to add: Displays a tree of all VirtualBox virtual machines and their
snapshots.
Select which snapshot to add and press Next.
Figure 2 – Configure snapshot: Enter the login information to be used for the snapshot.
After entering the information, Test snapshot runs a range of tests to ensure that the selected snapshot is
configured correctly for use with the program.
Press Finish to close the dialog and add the snapshot to the program.
3.4. Setting capture options
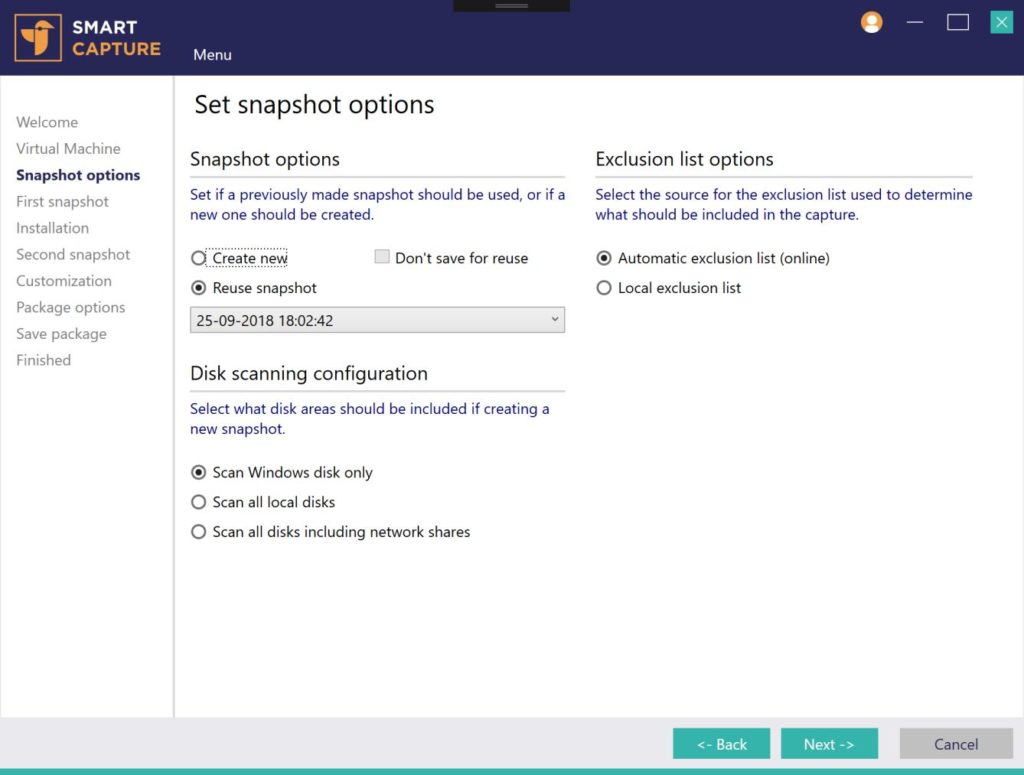
Options for how to create the snapshot can be set in this view. Any settings set here affect both the first
and the second snapshot taken.
Snapshot options:
- Create new: Creates a new snapshot, instead of reusing an existing one.
- Don’t save for reuse: Do not save the new snapshot for subsequent runs of the program.
- Reuse snapshot: Use an existing snapshot rather than create a new one.
Disk scanning configuration:
Select what areas of the target machine should be scanned while creating the capture.
Exclusion list options:
Select if the automatic online exclusion list should be used. It is highly recommended to leave this option
enabled, as the machine learning algorithms of the Smart Package Studio server helps by dynamically
customizing the exclusion lists and depends on knowledge gained by all of our users.
3.5. Running the target installation
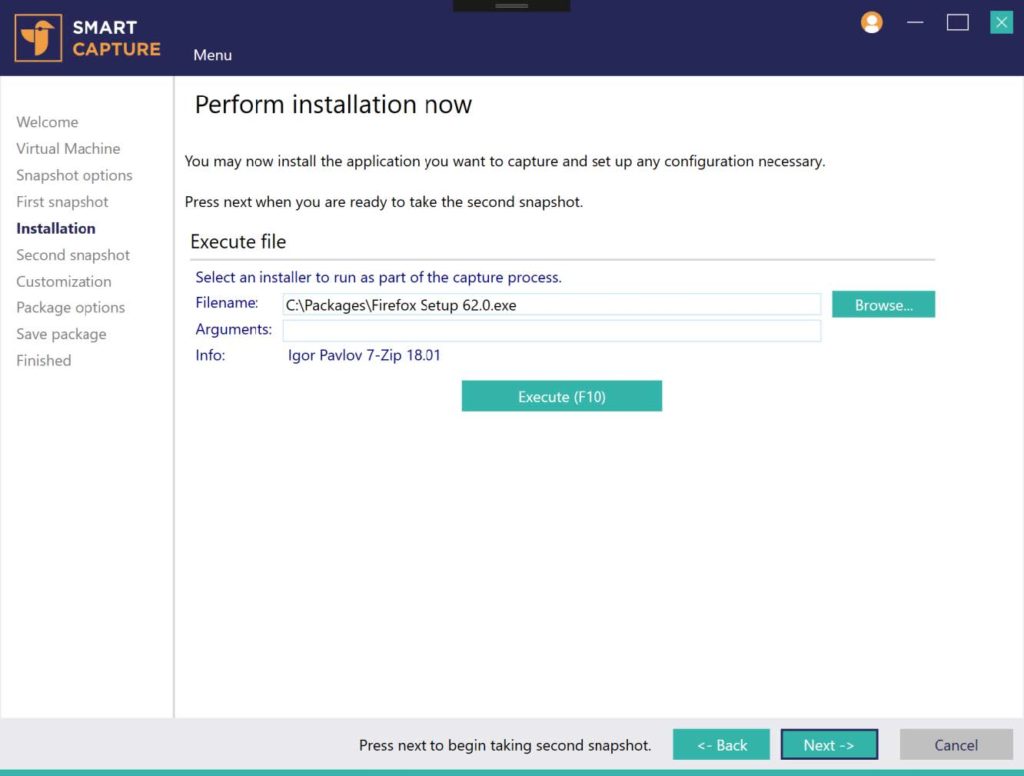
Once the initial snapshot has been created, the target installation for the capture can be executed.
Use the Browse button or drag any supported file type into the window to prepare it for execution. Set any
arguments for the installer, and press the Execute button to run the installer.
Note: A message will appear if the installer returns any non-zero return code. This does not necessarily
mean that the installation failed, since different installers may use return codes to signify various
installation results rather than errors. Check the documentation of the target installation if you are
unsure if the installation resulted in an error state.
Once the installation has completed, you can perform any actions in the machine that should also be captured
in the resulting project package.
This may include:
- Installing additional software.
- Copying files or importing registry values.
- Opening the installed application(s) and setting preferences.
Reboots may be performed if capturing from a remote or from a virtual machine.
Once all related actions have been performed, press Next to create the second snapshot.
3.6. Managing capture exclusions and inclusions
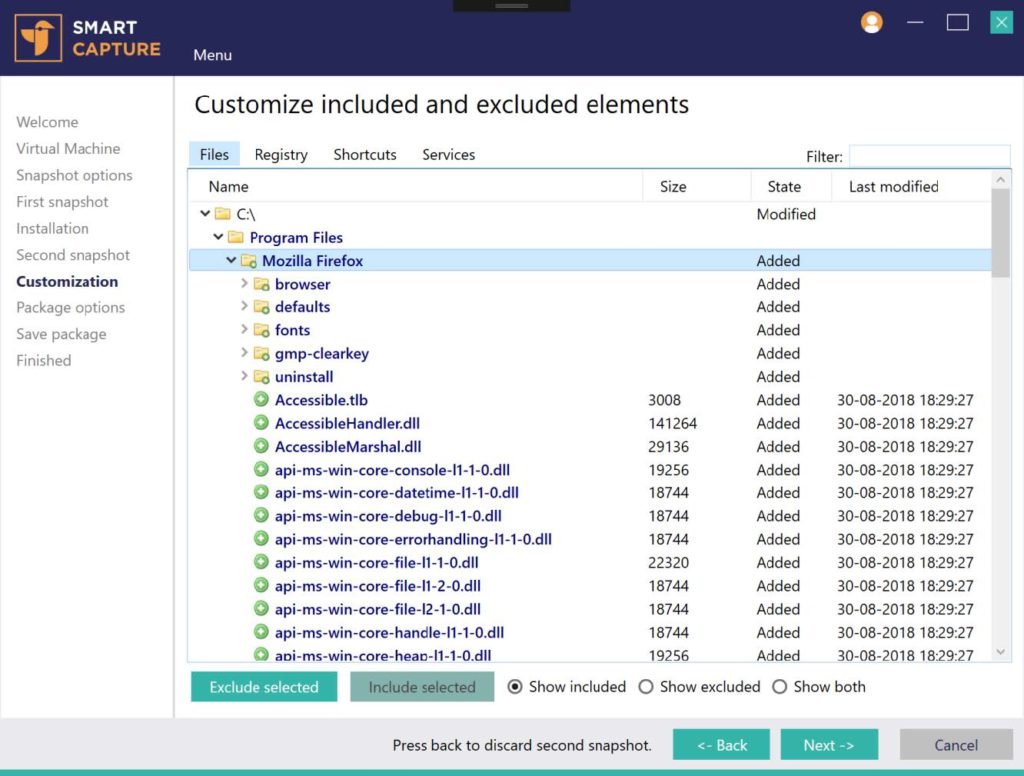
Once the second snapshot has been taken it is possible to choose what items captured should be included in
the resulting project. Items can be manually excluded or included from this view.
The Show included, Show excluded, and Show both radio buttons are used to choose what items
are currently visible.
The Files, Registry, Shortcut and Services tabs contain the various types of items captured.
Tabs that do not contain any items will not be visible.
The Filter can be used to only show items that match a specified string.
3.7. Setting package options
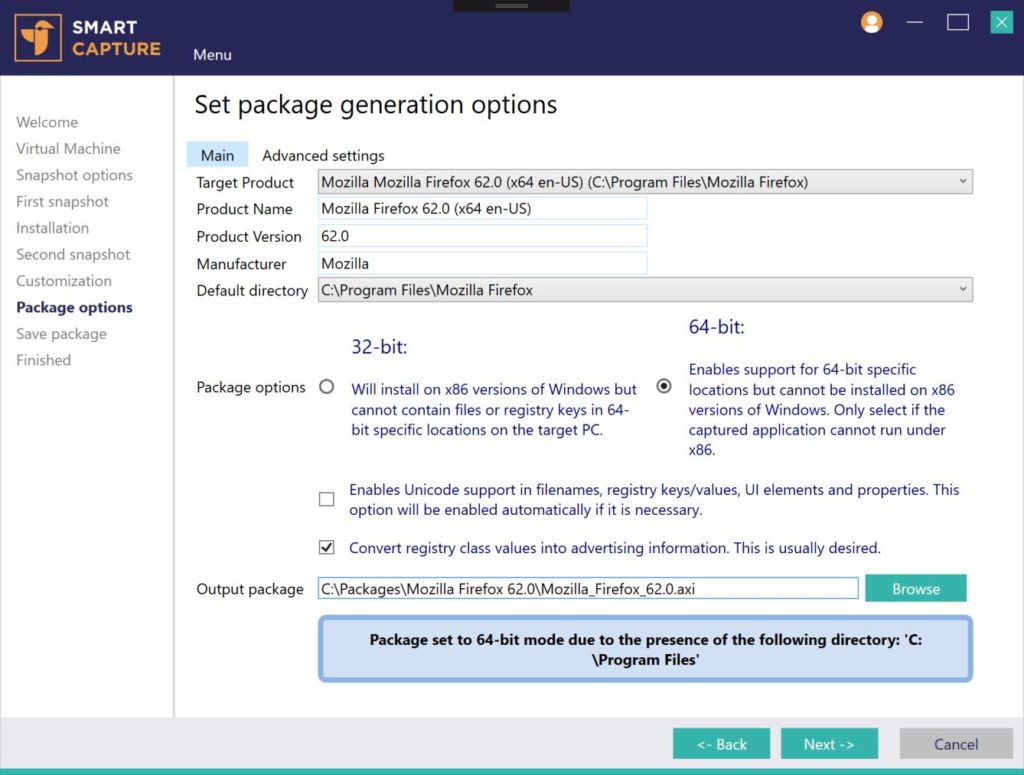
This view enables setting options for the project package to generate:
- Target product: If more than one installation was detected in the capture, this enables selecting
which one contains the main target application. This sets the other properties (Product Name,
Version etc.). - Product Name: Specifies the name of the generated project.
- Product Version: Specifies the version of the generated project.
- Manufacturer: Specifies the manufacturer used for the generated project.
- Default directory: Specifies the directory to set as INSTALLDIR.
- Package options: Contains major settings for the generated project.
- Output package: Specifies the file name of the generated project package.
Notices and/or warnings are displayed at the bottom.
The Advanced settings tab contains detailed settings for each step of the project generation process.
These do not generally need to be modified.
Pressing Next will start the process of generating the project package.
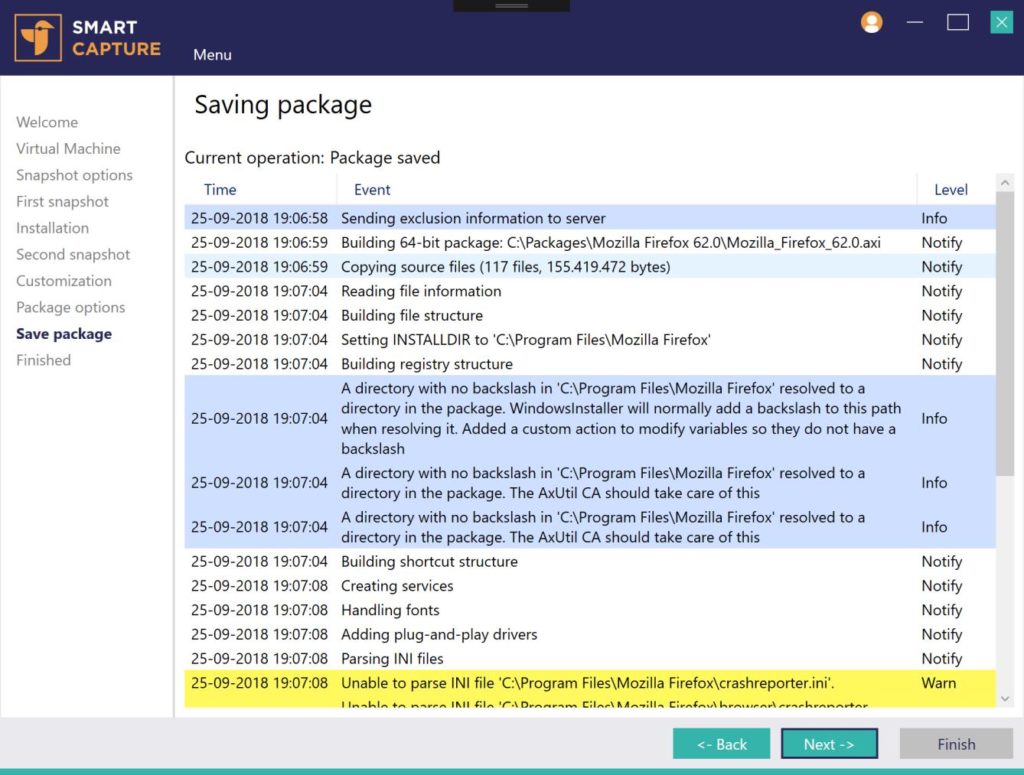
The Saving package view will display the progress and any notices, warnings or errors encountered
during the project generation process.
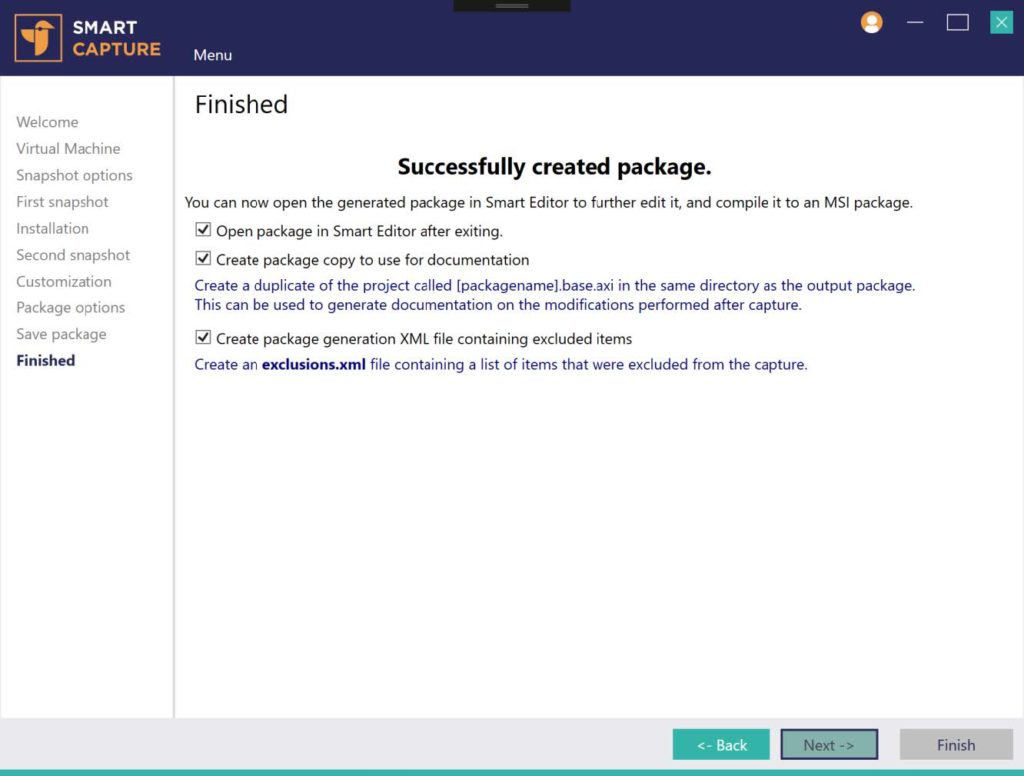
The Finished view displays the end state of the package generation process and options to perform at
the end of the procedure.
- Open package in Smart Editor after exiting: When closing Smart Capture, will open the newly
generated project package in Smart Editor. - Create package copy to use for documentation: Creates a copy of the project file to use for a
comparison to create documentation on what items have been changed in the project file. - Create package generation XML file containing excluded items: Creates an XML file in the same
directory as the project containing information on what items were excluded from the capture.